
An inspection is a procedure with a beginning, a sequence and an end, and the outcome depends less on the inspector than on what was agreed before the visit. Where a standard exists in writing, an inspection is a comparison and takes a day. Where the standard lives in somebody’s head, the same visit produces a difference of opinion and a lot of photographs.
Garment Quality Inspection Process: what has to be decided before it starts
Four decisions turn an inspection into a procedure. The standard, which means an approved reference sample plus a measurement specification carrying tolerances. The plan, which sets how many pieces are drawn from the lot and how many defects of each class are tolerated. The classes themselves, so that a broken seam and a loose thread are not weighed equally. And the authority to stop, because an inspection that can only report an opinion cannot reject a lot.
The sequence of those decisions matters. Agreeing a plan before production lets the factory schedule the inspection time into the packing calendar; agreeing it before shipment means the plan is competing with a sailing date. The same applies to the standard: an approved sample photographed and retained before cutting is a reference, while one reconstructed afterwards is a negotiation.
One practical point is often overlooked. The inspection brief should state what the inspector is not expected to judge, because a brief that covers fit, shade judgement and packaging appearance without a reference for each produces findings that cannot be closed.
The stages, in order: pre-production, in-line and final
Each stage protects a different part of the order, and the reason to put a check early is that a fault becomes uneconomic to correct at a point you can predict.
| Stage | What it decides | What it can still change |
|---|---|---|
| Pre-production | Whether bulk may use these materials, colour, trims and finish | Everything, because nothing has been cut |
| In-line | Whether the run is holding the specification | Machine settings, placement and the affected pieces |
| Final | Whether the lot may ship | Rework and replacement, at the highest cost |
The pre-production check is the cheapest gate and the one most often reduced to a formality. It should be an actual approval against a physical reference, made in the production fabric with the real decoration, because a print or embroidery changes how the cloth behaves where it is placed. The in-line check is the only stage at which a drifting measurement can be pulled back, and it is therefore the stage that most repays a buyer’s presence or a third-party visit. The final check classifies the lot and protects the shipping decision.
How a sampling plan is applied to a lot
A sampling plan converts a lot into a decision. The lot size and the inspection level determine how many pieces are drawn; the class of defect being counted determines how many are tolerated before the lot is rejected. The two halves only work together, which is why quoting a single figure describes nothing on its own.
Two consequences follow for the procedure. An acceptance number is not a claim that the lot is perfect; it is a defined tolerance for a defined class of fault, and the pieces outside the sample are accepted on the strength of that inference. And the plan should be applied to the classes the buyer actually sells against, because a plan that weighs cosmetic and functional faults equally will reject lots that would sell and accept lots that would not.
The physical properties being judged have neutral vocabulary in the ASTM standards programme for textiles, and the scope a testing house applies to garments is published, as Intertek’s textiles and apparel testing range illustrates.
Defect classes and the accept/reject decision
Classification keeps an inspection from becoming a debate about individual pieces. A critical defect makes the garment unsafe or unsaleable. A major defect affects function, fit or appearance in a way a customer would notice and return. A minor defect is visible only on close inspection and does not affect use.
The decision then follows the plan rather than the inspector’s impression: the lot is accepted or rejected against the agreed numbers for each class. Where a fault sits between two classes, the comparison that settles it is with the approved reference rather than with a preference, which is why the reference has to be physically present at the inspection.
Measurements, fit and grading: what the check compares
A measurement check compares values against a specification that states a base size, a tolerance and a grade direction. Without tolerances the check is an argument; without a base size it cannot be repeated by a second maker. The values should be recorded rather than reduced to a pass or fail, because the numbers are what show whether the run is stable or drifting.
Where the range is wide, measure the base size and the extremes. A grade that holds in the middle frequently fails at the ends, and the failure appears only when the ends are measured. Where fit judgement is part of the brief, the garment should be assessed on a form or a body inside the intended size range, since a fit comment from outside the range describes the range rather than the garment.
Fabric and colour tests that run alongside the garment check
Three properties carry most of the risk, and they are tested before the garment check rather than during it. Shrinkage decides what the garment measures after its first care cycle. Colour fastness decides whether the shade survives washing, rubbing and light. Fabric weight against the stated tolerance is usually the first place a substitution becomes visible.
Two conditions make the results usable. The test should be run on the production lot rather than a comparable roll, since a mill’s output varies between lots. And the conditions of the test should be recorded, because shrinkage depends on temperature and cycle and a result without its conditions cannot be compared with the specification. Harmful-substance testing follows OEKO-TEX Standard 100, whose certificate names the articles in scope.
The inspection report: what the record has to show
The report is the deliverable. It should identify the order and the lot, record the quantity inspected and the date, show the measurements taken against the specification, list the defects by class, state the accept or reject decision against the agreed plan, and attach photographs of any fault that is not self-explanatory.
Two habits make it durable. Name the inspection point the report refers to, because a final report is evidence about goods rather than about the process that made them. And file it with the approved sample and the measurement table, so a question raised months later is answered from one file rather than a search through correspondence. Where the finding is a workplace or ethical one rather than a garment one, the platforms that hold audit reports, such as Sedex, show how a finding is recorded and tracked to closure.
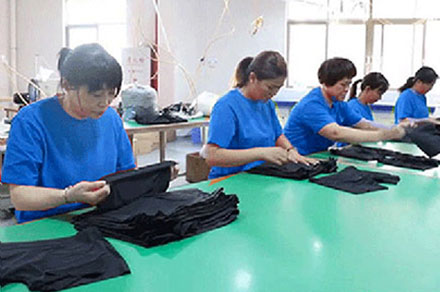
What are the steps involved in quality inspection in the garment industry?
Agree the standard, draw the sample, measure and classify, then decide and report.
The sequence runs from the agreed specification and reference sample, through a sampling plan applied to the lot, to measurement and defect classification against that plan, and ends with a written decision and a follow-up where a fault is systematic.
The sequence is fixed for a reason: the standard has to exist before the draw, because the inspector needs to know what is being compared; the plan has to exist before the classification, because the numbers decide the outcome; and the decision has to be written, because a lot released on a verbal judgement cannot be revisited.
The step most often skipped is the follow-up. Where a defect is systematic rather than random, the inspection closes into a corrective action that names the change, the owner and the evidence. The programmes that publish that structure for workplace findings, such as amfori for the BSCI framework, are useful models for what closure looks like in practice.
What are the 7 steps of the inspection process?
Seven steps, from agreeing the standard to following up the result.
Agree the standard, select the lot and draw the sample, inspect against the checklist, measure the critical dimensions, classify the defects, decide against the plan, and report with follow-up.
Read as a procedure, the seven steps make the dependencies visible. Steps one and two are preparation and cannot be recovered later. Steps three to five produce the evidence. Step six applies the rule that was agreed in advance. Step seven is the only step that improves the next order, and it is the one that disappears when an inspection is treated as a one-off event.
A practical version of the sequence also assigns a document to each step: a specification and reference sample, a lot sheet and a draw record, a checklist, a measurement sheet, a defect log, a decision note, and the report. Where the documents exist, the procedure can be audited; where they do not, the inspection depends on the inspector, which is the definition of an unmanaged process.
Conclusion
The garment inspection process is a procedure rather than a visit, and it begins well before the inspector arrives. Agree the standard and the sampling plan, place the three checks where each can still change something, measure and classify against the plan, and finish with a written decision. A lot that is released against a written rule can be revisited; a lot released against an impression can only be regretted.
FAQ
What has to be agreed before an inspection takes place?
An approved reference sample, a measurement specification with tolerances, a sampling plan with accept and reject numbers, the defect classes to be counted, and who has the authority to reject a lot. Without those, an inspection can only report observations.
Does an accepted lot mean there are no defects?
No. An acceptance number defines how many defects of a given class are tolerated in the sample, and the rest of the lot is accepted on that inference. That is why the plan has to be agreed against the classes the buyer actually sells against.
Why measure the extremes of a size range?
Because a grade that holds in the middle of the range often fails at the ends, and the failure only appears when the end sizes are measured. Checking the base size alone tests the middle of the range rather than the order.
When should fabric tests be run?
Before the garment check, and on the production lot rather than a comparable roll. Shrinkage, colour fastness and weight are the three that most often decide whether a lot is accepted, and each result is only comparable if the test conditions are recorded.
Next step. If you are arranging an inspection, send the specification and the quantity involved. The team can confirm which stages suit the garment, what the sampling plan should define, and what the report will record at each check.